
The Bookkeeper
- +20% Vigor refill
- Uplink offline until day 50
Runs things by the numbers. Fast hands, and the Uplink stays dark for the first 50 days.
Every rule in the game, in the game's own words. The text below is the in-game codex, rendered from the same strings the game ships, with the shipping numbers filled in. The tables under each entry are read straight from the engine data. Synced 2026-10-01.
How the colony feels.
Morale moves toward its target slowly at first, then faster the longer it keeps going the same way. A drop closes half the gap in about 2.4 days, a rise in about 3.2 days. Outpost > Services shows what makes the people happy.
The target Morale cap is 85. You get 15 for housing everyone, up to 55 for covering the services people ask for, and 15 for having Biomass and Filtrate in the stores. Every colonist who has nowhere to sleep costs 5. A service people ask for but don't have costs Morale. Dead colonists with no grave cost 1, plus 1 more for every 4 dead, up to 4, and each Burial Field buries 6. Shortages, an open incident, and having no Heat Cells all subtract.
The Morale cap is 85 for most colonies, some buildings and colonist traits increase it. The floor is -50. Command refills once Morale reaches either 50, or 75% of what housing, services and food can give together, whichever of the two is lower. Below -10, unrest costs Command every few days - more the lower Morale sinks, and sooner the more Command you hold. Below zero, colonists start leaving too, sooner the heavier your Morale penalties are, and no more than one every 4 days.
Your standing with the Directorate. At zero you lose the run.
Command only changes on certain events. Outpost > Leaders lists every gain and every loss - Unrest, Losses, Desertion, Directorate impatience, and the rest.
Finishing a quest gives you 3. A colony above 50 Morale refills about 0.35 Command per day, slower the higher it gets. Every colonist who dies or leaves costs 8, and each later loss costs 2 more. Every new colonist gives 2. An overdue quest costs 0.75 per day until the quest is done.
Command is checked at the end of every day and after every incident choice. At zero the Directorate recalls you.
The Diplomat never refills Command passively. Quests pay twice the usual payout instead, and relic finds still count, so ruins matter more to that commander.
The patience budget on the current quest, and what it costs to miss it.
Every quest has a patience budget in days. It ticks down while the quest is open and refills when you finish it.
At zero the quest is overdue and you lose 0.75 Command per day, multiplied by the difficulty level and the pace level. On Hostile the drain starts early, with 44% of the budget still left, and on Lethal and above with 53% left. It doesn't stop until the quest is done, but it shrinks once Command runs low, and on Nominal and Hostile it stops at 6 and 3 Command. The Diplomat never goes overdue.
Relaxed pace multiplies every budget by 2 and the drain by 0.5. Sandbox has no quests, patience or scoring.
What every action costs.
Every action costs Vigor, and it refills on its own - a base rate, plus more for every colonist. Colonists beyond the first 4 add half as much. A Council and some techs increase the rate further.
Vigor has a soft cap of 3. Every point above it slows the refill a little more, until it stops at about 5 plus 1 per colonist. Spend it instead of sitting on it.
How the colony grows.
To grow, you need to build beds, Biomass in the stores, Morale above zero, and no incident waiting. Running out of Filtrate doesn't stop arrivals, but it does kill people. The Outpost panel shows what's holding you back.
Morale has to stay above zero for the colony to grow. Below that cap it doesn't change the speed. When Morale climbs past what housing, services and food can give, every point over it speeds growth up.
New colonists wait at the door for 16 days. If nobody lets them in, they leave, and that counts as a loss: it costs 2 Command and makes the next loss cost more. If the colony is empty you have 15 days before you lose. A colonist waiting at the door pauses that clock, and welcoming one ends it.
Seven types, four of them at the beginning.
You start each run with 4 types of resources: Biomass, Filtrate, Fiber and Heat Cells. Medicine, Regolith and Alloy come later, when research unlocks them. Once Medicine is unlocked and the colony reaches 7 colonists, every colonist uses 0.05 Medicine a day.
Every resource has a capacity. A store below its capacity accepts one scavenge or production tick even if that goes over the capacity, but a store at or over capacity gains 0. Capacity comes from buildings, plus a few techs, doctrines, boons and artifacts. Sustenance 1 unlocks silos, which hold more than stores. After that you can't build new stores, but the ones you have keep working.
Scavenging gets you additional resources on top of your production. The scavenged resources arrive as map bubbles 2 to 5 days later for you to collect. Each scavenge of a resource costs more Vigor than the last. Biomass and Heat Cells climb 1 per scavenge, up to 4 over the base. Fiber and Regolith climb slower, Medicine and Alloy climb faster, and Filtrate never climbs. Every 6 months each price drops one step, down to 1 Vigor.
You can order a building or tech research you can't pay for. The game shows which resource will go negative. A negative store acts like an empty one, and the order pauses while that store is at zero or below. Nothing else that costs that resource can start while the resource is in the negative.
| Resource | Unlocked | Per colonist | Scavenge Vigor | Scavenge yield | Role |
|---|---|---|---|---|---|
| Biomass | Start | 0.16/day | 1 | 3 | Food. Seasonal growers halt through the Drift; fauna pens run all year. |
| Filtrate | Start | 0.36/day | 1 | 2 | Water. Condensers build on the Landing Zone; wetland is the rich ground. |
| Fiber | Start | - | 1 | 1.4 | Chitin-flora. The universal build material - almost everything costs Fiber. |
| Heat Cells | Start | 0.01/day | 1 | 1.6 | Biofuel. Heat Rings burn 5x as much through the Drift. |
| Medicine | Sustenance 3 | - | 2 | 1.2 | Medicine. Feeds the Med Bay and Med Lab. |
| Regolith | Industry 2 | - | 3 | 1.2 | Ground stone. Bulwarks, kilns, training grounds. |
| Alloy | Industry 3 | - | 3 | 1.2 | Refined metal. Spire habs, thermal lattices, signal lances. |
| Building | Category | Requires | Vigor | Materials | Days | Where | Effect |
|---|---|---|---|---|---|---|---|
| Sleep Pod | Housing | - | 0 | 1 | 1 | Core | 1 bed, quality 0 |
| Hab Cluster | Housing | Sustenance 1 | 0 | 2 | 2 | Core | 1 bed, quality 1 |
| Hab Complex | Housing | Sustenance 3 | 0 | 4 1 | 2 | Core | 1 bed, quality 2 |
| Heat Ring | Service | - | 1 | 1 | 2 | Core | serves 3, weight 3; upkeep 0.12/day |
| Latrine | Service | - | 1 | - | 2 | Core | serves 2, weight 2; upkeep 0.11/day |
| Mess Hall | Service | Uplink T2 | 1 | 1 | 2 | Core | serves 1.5, weight 2; upkeep 0.13/day |
| Heat Hearth | Service | after Heat Ring | 2 | 2 | 2 | Core | serves 6.6, weight 3; upkeep 0.24/day |
| Sluice Latrine | Service | after Latrine | 2 | 2 | 2 | Core | serves 4.4, weight 2; upkeep 0.22/day |
| Canteen | Service | after Mess Hall | 2 | 2 | 3 | Core | serves 3.3, weight 2; upkeep 0.26/day |
| Gathering Circle | Service | Uplink T2 | 3 | 3 | 2 | Core | serves 3, weight 2; Morale ceiling +5 |
| Joinery | Service | Uplink T4 | 3 | 3 | 3 | Core | serves 3, weight 2; upkeep 0.12/day |
| Fabricator Bay | Special | Industry 3 | 2 | 3 | 3 | Core | +1 build team |
| Survey Mast | Special | Survey 1 | 2 | 3 | 3 | Core | +1 survey team |
| Med Bay | Service | Sustenance 3 or Uplink T4 | 3 | 2 | 3 | Core | serves 3, weight 2; upkeep 0.15/day; growth x1.5; heals Wardens |
| Filtrate Condenser | Production | - | 1 | 1 | 1 | Core, Wetland | +0.4/day |
| Deep Condenser | Production | Sustenance 1 | 2 | 2 | 2 | Core, Wetland | +1.04/day; upkeep 0.1/day |
| Spore Orchard | Production | - | 1 | 1 | 2 | Sporeplain | +0.375/day; halts in the Drift |
| Animal Pen | Production | - | 1 | 2 | 2 | warren | +0.25/day |
| Harvester Hut | Production | - | 1 | - | 1 | Chitin grove | +0.2/day |
| Biofuel Vat | Production | - | 1 | 1 | 1 | Core, Ruinfield | +0.2/day |
| Fiber Store | Storage | - | 1 | 1 | 1 | Core, Chitin grove | cap +5 |
| Heat Cell Store | Storage | - | 1 | 1 | 1 | Core, Ruinfield | cap +5 |
| Biomass Store | Storage | - | 1 | 1 | 1 | Core, Sporeplain, warren | cap +4 |
| Filtrate Store | Storage | - | 1 | 1 | 1 | Core, Wetland | cap +4 |
| Biomass Silo | Storage | Sustenance 1 | 2 | 2 | 1 | Core, Sporeplain, warren | cap +8 |
| Filtrate Tank | Storage | Sustenance 1 | 2 | 2 | 1 | Core, Wetland | cap +8 |
| Fiber Loft | Storage | Sustenance 1 | 2 | 2 | 1 | Core, Chitin grove | cap +10 |
| Heat Cell Vault | Storage | Sustenance 1 | 2 | 2 | 1 | Core, Ruinfield | cap +10 |
| Cold Store | Storage | Sustenance 3 | 2 | 2 | 1 | Core, Wetland | cap +4 |
| Ore Bin | Storage | Industry 1 | 2 | 2 | 1 | Core, Ruinfield, Chitin grove | cap +6 |
| Alloy Rack | Storage | Industry 2 | 2 | 2 | 1 | Core, Ruinfield | cap +6 |
| Deep Vat | Production | Sustenance 2 | 3 | 3 | 2 | Ruinfield | +0.34/day |
| Bath House | Service | Uplink T3 | 2 | 2 | 3 | Core | serves 3, weight 2; upkeep 0.22/day |
| Training Grounds | Defence | Warfare 2 | 3 | 3 1 | 3 | Core | Wardens +20% |
| Med Lab | Production | Sustenance 3 | 3 | 3 | 3 | Sporeplain, Chitin grove, Wetland, Ruinfield, warren | +0.35/day |
| Regolith Kiln | Production | Industry 1 | 3 | 2 2 | 3 | Sporeplain, Chitin grove, Wetland, Ruinfield, warren | +0.2/day |
| Nursery Dome | Special | Sustenance 4 | 3 | 4 | 3 | Core | growth x1.4 |
| Colony Archive | Special | Survey 2 | 3 | 3 2 | 3 | Core | Morale ceiling +5 |
| Fire Watch | Special | after Fire in the Heat Cell Store | 3 | 2 | 2 | Core | |
| Curing Shed | Special | after Spoilage in the Stores | 3 | 2 | 2 | Core | |
| Settling Tank | Special | after Tainted Tanks | 3 | 1 1 | 2 | Core | |
| Drying Racks | Special | after Mould in the Bales | 3 | 1 1 | 2 | Core | |
| Warning Spikes | Special | after Pack Frenzy | 3 | 2 | 2 | Core | |
| Assembly Hall | Special | after Unrest | 3 | 3 | 2 | Core | |
| Alloy Forge | Production | Industry 2 | 4 | 2 3 | 4 | Core | +0.2/day |
| Stronghold | Defence | Warfare 2 | 3 | 3 2 | 3 | Core, Sporeplain, Chitin grove, Wetland, Ruinfield, warren | fortifies 2 |
| Feral Pen | Defence | Warfare 3 | 3 | 2 2 | 4 | Core, Sporeplain, Wetland, warren | fortifies 1 |
| Hunting Hollow | Service | Uplink T3 | 3 | 2 | 2 | Core | serves 3, weight 2; upkeep 0.12/day |
| Scholar's Dome | Service | Survey 2 or Uplink T5 | 3 | 3 1 | 3 | Core | serves 3, weight 2; upkeep 0.18/day |
| Shrine of Resonance | Service | Industry 4 or Uplink T6 | 3 | 2 1 | 3 | Core | serves 3, weight 1; upkeep 0.1/day |
| Brewhouse | Service | Sustenance 4 or Uplink T6 | 2 | 2 1 | 2 | Core | serves 3, weight 1; upkeep 0.14/day |
| Burial Field | Special | - | 1 | 1 | 1 | Core, Sporeplain, Ruinfield | buries 6 dead |
| Spire Hab | Housing | Industry 4 | 0 | 4 1 | 3 | Core | 1 bed, quality 3 |
| Heat Blankets | Special | Industry 2 | 4 | 2 2 | 4 | Core | upkeep 0.1/day; Drift shelter |
Four research tracks across Uplink Tiers.
Research runs in 4 tracks, each levelled 1 to 4, in Outpost > Uplink. Warfare buys Warden gear, fortifications and a Command payout. Sustenance is for housing, Biomass, Filtrate and healing. Industry unlocks Regolith deposits, then Alloy, then an extra build team. Every track opens Regolith scavenging at Uplink Tier 4. Survey improves surveying, and makes surveys and expeditions pay better.
Tier is one plus your total levels across all four tracks, capped at 7, so it stops growing once you researched 6 levels. Each tier adds 15% Warden strength, with a further 40% at tier 3 and 40% at tier 6. Tier also sets the Vigor a festival pays, and Vigor income rises again at tiers 5 and 6.
Level 2 is free to take on any track, but the levels above it force you to spread out. Level 3 needs 3 total levels across all four tracks, and level 4 needs 5.
Tier also caps how many copies of one producer an area can hold. For example at tier 3 you can build three kilns per area. Condensers on a wetland are exempt, and the Landing Zone holds one more condenser of each type than the tier.
Finishing a level always offers a tech draft of 3 cards, drawn from the track you just finished. Other tracks fill in only when that track has no cards left. You keep one. The ones you passed on can come back in a later draft. Techs are small permanent bonuses.
| Level | Materials | Days | Unlocks |
|---|---|---|---|
| 1 | 2 3 | 5 | Regolith via Industry (cap 8); Warfare: +5 Command once; Sustenance: +5 Morale once |
| 2 | 4 7 | 5 | Alloy via Industry (cap 8) |
| 3 | 8 1 or 12 14 | 6 | Medicine via Sustenance (cap 6) |
| 4 | 2 1 or 16 24 | 6 | - |
| Tech | Track | Effect |
|---|---|---|
| Sharpened Chitin | Warfare | Front Wardens take 17% less damage each round. |
| Light Step | Warfare | Retreating after the first day's fight won't wound your Wardens. |
| Antiseptic Moss | Sustenance | Wardens heal 25% faster. |
| Hearth Songs | Sustenance | +10 Morale cap. Unburied dead weigh half as much on Morale. |
| Festival Drums | Sustenance | Festivals recharge 6 days sooner. |
| Field Kitchens | Sustenance | Wardens outside your claimed areas heal too, at the slow rate. |
| Prefab Frames | Industry | Buildings finish 1 day faster. |
| Scrap Economy | Industry | Buildings cost 1 less Vigor. |
| Deep Stores | Industry | +5 storage cap for all resources. |
| Second Crew | Industry | +1 active build team. |
| Second Scouts | Survey | +1 survey team. |
| Sifting Hands | Survey | Scavenging turns up +1 extra find. |
| Trickle Relay | Survey | +0.1 Vigor per day for each connected area you hold. |
| Survey Caches | Survey | Each finished survey leaves 2 of a random base resource to collect. |
How you survey the fog.
Surveying reveals a fogged area. It costs more Vigor the farther the area is from the Landing Zone, 1 for adjacent areas and up to 3 at the far edge. Every 4 areas you've claimed add 1 more. A large area can cost 1 more and a small one 1 less. You can only survey areas that border your revealed areas.
Survey track level 3 decreases every survey's cost by 1 Vigor. A Warden sitting near a fogged area decreases it further given enough time. The Surveyor pays -1 Vigor for survey and +1 Vigor for claims, and sees what's on an area before you survey. The Forager surveys blind - feral packs stay hidden until they reach your border.
Gathering from areas you don't own.
You can send an expedition to any surveyed or claimed area except the Landing Zone, for 2 Vigor, as long as no ferals stand on it. It returns after 3 days with what that area produces: Biomass on sporeplain and warren, Fiber on chitin grove, Filtrate on wetland, Heat Cells on ruinfield.
Expeditions don't need the area claimed, so they are the cheapest way to farm areas you can't hold yet. Survey track level 4 increases every expedition's output by 1. A pack wandering onto the area doesn't cancel an expedition already on its way back.
Two ways to grow Biomass, and only one survives the Drift.
A Spore Orchard on sporeplain produces 0.375 Biomass per day. An Animal Pen on a warren produces 0.25. The orchard stops during the Drift, pens don't.
Cut-off areas stop producing.
An area is only yours while claimed areas connect it back to the Landing Zone. Rivers and lost areas break that chain.
Cut-off areas stop producing and lose buildings one at a time. They cost 5 Morale each, up to 15. Eventually the colonists there walk away.
Reclaiming any missing link repairs the whole chain at once.
The cold season in months 12-2.
In the first Drift Heat Rings burn Heat Cells 5x faster, and every Drift after it adds 1x, up to 10x. Sporeplain stops producing Biomass. A Heat Ring only burns for the colonists it keeps warm, so spare rings cost nothing. Heat Rings also matter more, because their Morale floor drops by 60 until the Drift ends. The calendar and the map clock both show it coming. The Driftborn's production ignores the Drift entirely.
Store Heat Cells before the Drift. Freezing kills faster than starving.
Verdant (months 3-5) has no penalty. The first Arid (months 6-8) decreases Filtrate production to 0.5x and raises Filtrate use to 1.25x. Every Arid after it is harsher, down to 0.3x production and up to 1.5x use. Ashfall (months 9-11) decreases Biomass production to 0.75x. A year is 12 months of 8 days.
What running out costs you, and how fast.
Running out decreases Morale first, then it kills. Filtrate is the fastest: after 4 days without it, every colonist has a 15% chance to die each day. Biomass takes longer, 5 days, but the chance is higher at 25%.
Freezing is the worst of the three. During the Drift, running out of Heat Cells gives you 3 days before the 15% daily chance starts, or 6 days at 8% with a supplied Drift shelter. Stock up before the Drift, because once the Heat Cells run out it's too late to build anything.
The reward for keeping people happy.
A festival unlocks when Morale reaches the festival target. The target is the highest Morale your colony can currently reach, at most 100 and at least 80. If your buildings can't even support 80 Morale, the target drops to what they can support.
A festival costs no Morale. It gives you 3 Command, Vigor equal to your Uplink Tier, and 5 extra days of patience. The feast increases Biomass and Filtrate consumption by 25% for 3 days. The next festival is possible 48 days later, or 42 with Festival Drums researched.
A permanent choice about how you run the colony.
Once you reach 5 people and day 60 you have to pick a governance. This is the one choice you can't undo.
Autarchy gives you 12 Command at once. Inspire gives you 8 Command, but you start losing Command below 20 Morale instead of below -10. Council costs 8 Command up front and pays it back over time: hold 60 Morale or better and Vigor refills 25% faster.
Each choice also has its own incident that fires once when its trigger hits. Autarchy gets unrest when Morale runs low, Inspire gets exhaustion during the Drift, and Council gets deadlock when a shortage drags on.
The only Command you can earn on your own schedule.
Sweeping a claimed ruinfield turns up 3 relics, each worth 2 to 4 Command. It costs 3 Vigor the first time. Unlike quests and festivals, you can do it whenever you like.
The Command arrives as bubbles on the map a few days later, and you have to collect it. Each sweep costs 1 more Vigor every 2 sweeps, up to 12.
Decisions with a countdown. Leaving one open costs Morale and growth.
Incidents arrive as map bubbles. You have 6 days to resolve it before it opens on its own. An open card costs 10 Morale until you resolve it. The Kindler doesn't pay the cost of choices, and gets one fewer option.
An open card also stops population growth completely. Don't leave them open for too long.
An incident fires at most once a run. Some cards carry between runs - if you met one in an earlier run, there's a 10% chance it comes back.
Keeping the borders safe.
Wardens heal 2% per day on claimed areas, or 5% with a working Med Bay. A healing Warden shows a pulsing green ring on the map. Antiseptic Moss multiplies that rate by 1.25x. Disbanding gives back 50% of the first recruit's 3 Vigor, scaled by the health that Warden has left. On Nominal and Hostile, a Warden who dies gives back 30% of it.
A Warden becomes a veteran after killing 3 whole packs, and ranks up again at 6 and 10. Each rank adds 15% strength and heals faster on your claimed areas: 1.25x, 1.5x and 1.75x the usual rate. Fights that leave the pack alive don't count. If a veteran dies, you lose more Morale. Retreating from a fight costs no Vigor.
Every claimed area increases your Wardens' strength by 2%, and 100 Morale increases it by 10%. Reaching Uplink Tiers 3 and 6 increases it by 40%, every other Tier by 15%.
The first Warden costs 3 Vigor. Later recruits cost more (4, 6, 8, 10, 12) and need more population (3, 6, 9, and so on). Training starts at 4 days and takes longer for each recruit (6, 16, 20, 24, 28). There's no fixed cap: you can have at most 1 Warden per colonist, and every recruit past the 6th costs 2 more Vigor than the last. You can only recruit on claimed areas, where there's no other Warden.
Warfare research unlocks squad kit, one piece per Warden. Chitin Plate at Warfare 1 decreases the wounds a Warden takes by 50%. Venom Blades at Warfare 3 adds 30% strength against a bloom or the nest. Signal Lance at Warfare 4 lends 50% strength to a fight two borders away. Kit is carried, not stored, so it marches with the Warden and it is lost for good when that Warden dies. Equip it from the area panel on any claimed ground where a Warden stands.
After 3 fights a Warden is promoted and you choose a class. An All-rounder stays as it was. A Defender fights at x1.4 on your own ground and x0.7 in the field. An Attacker is the opposite: x1.3 in the field, x0.8 at home. A Supporter is weak alone at x0.6, but lends x1.8 of the usual share to fights next door. Gear stacks on top, and the class can't be changed.
| Recruit | Needs colonists | Vigor | Training days |
|---|---|---|---|
| 1 | 1 | 3 | 4 |
| 2 | 3 | 4 | 6 |
| 3 | 6 | 6 | 16 |
| 4 | 9 | 8 | 20 |
| 5 | 12 | 10 | 24 |
| 6 | 15 | 12 | 28 |
| Gear | Requires | Vigor | Materials | Effect |
|---|---|---|---|---|
| Chitin Plate | Warfare 1 | 1 | 3 | Halves this Warden's battle wounds |
| Venom Blades | Warfare 3 | 1 | 1 2 | +30% strength vs. blooms and the nest |
| Signal Lance | Warfare 4 | 1 | 2 1 | Lends half-strength support two borders away |
Wardens use supplies every day, more outside claimed areas.
Every Warden on a claimed area uses 0.06 Biomass and 0.06 Filtrate per day. That cost is flat - ten Wardens cost ten times one.
Each Warden outside your claimed areas uses 0.08 Biomass and 0.18 Filtrate and burns 0.005 Heat Cells per day for every Uplink Tier, so a Warden outside costs three times as much at Tier 3 as at Tier 1. On Mild and Hostile that cost is flat per Warden. On Lethal it grows faster than the headcount, and 5 Wardens outside cost as much as 6.9 would at the flat rate. From Brutal up, 5 cost as much as 9.5.
If Biomass or Filtrate hits zero, Wardens outside your claimed areas lose 10% of their health every day and can die. Wardens on claimed areas take no damage from hunger, but they don't heal and they fight at 80% strength.
How adjacent Wardens lend strength.
An area holds one Warden at most. You can't march onto an area another Warden stands on, and you can't recruit there. You can't recruit on contested areas either - clear the ferals first.
Adjacent Wardens lend 50% of their strength to a fight in an adjacent area, but only if they aren't fighting themselves. An area with no Warden standing on it is still undefended - Wardens don't defend areas from adjacent ones.
The Landing Zone adds strength to every fight it can reach: 1 full Warden's worth on the zone itself, and 0.5 for adjacent areas. Wardens fighting on the zone itself are 1.5x as strong.
A Warden adding strength from an unclaimed area counts for 70% of its strength.
How Wardens move.
Drag a Warden badge to send it to any claimed or surveyed area. A day consists of 10 ticks - entering a claimed area costs 3 ticks, entering a surveyed area costs 5.
Marching costs no Vigor, and a Warden is considered staying in the area it left, until it arrives to its destination - so if you cancel its movement, it was like you never moved it in the first place.
A standing Warden slowly decreases survey and claim costs around it.
A Warden standing on a claimed area decreases the Vigor cost of surveying an adjacent area. One standing on a surveyed area, that is adjacent to any claimed ones, decreases the cost of claiming it. Claiming costs more the farther the area is from the Landing Zone, and 1 more for every 3 areas you've claimed. Reclaiming an area costs half of its original claim cost. The discount grows by 1 Vigor every 22 days and stops once the cost reaches zero.
An assisting Warden uses 0.1 Biomass and 0.1 Filtrate per day on top of its normal upkeep, and the work stops if either of the resources run out.
Where strength comes from, and how a fight resolves.
A pack's strength comes from its size and breed, the difficulty, and where it stands: a bloom you haven't cleared multiplies it by 3x and a nest by 1.4x. Your side gets the fighting Warden's strength and health, 50% of each adjacent Warden, plus bonuses on claimed areas, from Uplink Tier, defensive buildings and Morale.
A fight resolves once per day. The first day kills at most half the pack, so every fight lasts at least two days. After that you usually kill one feral a day. At more than 1.4x the pack's strength, you kill more, up to 8 per day. If the pack is more than 3x as strong, you kill fewer than one per day, down to one every 10 days. On a bloom or a nest that starts at 2x, and a pack stronger than your side wounds your Warden harder each day, up to 1.5x the usual wound. Off blooms and nests it works the other way too: a pack weaker than your side wounds less, down to 30% of the usual wound when you badly outnumber it.
Any pack can be killed eventually, some fights just take longer than the Warden survives. You can retreat whenever you want by marching the Warden away, but the pack always gets its first swing. Leaving before the first day's fight still wounds the Warden by 30%. After that, leaving wounds it by 5% for each day fought, up to 15%. Light Step removes that later wound, but not the first swing.
A pack entering from a fogged area catches you by surprise and decreases your strength to 50%. A Stronghold on the area prevents that.
What each breed does.
There are 6 breeds. Early campaign regions only have standard Feral packs. Later regions add more, and the last region has all of them. Blooms spawn only standard Feral packs until day 180; after that, 40% are standard Feral packs and the rest are breeds. From day 450, only 10% are standard Feral packs. Tap a pack badge to check its breed.
Brutes fight at 2x strength. An Alpha pack fights at 1.5x, and when you kill the pack, half of it scatters to adjacent unclaimed areas instead of dying. Corroders fight at normal strength, but if you fight them on your own claimed area, you lose the area even when you win, and it stays locked for 10 days. Fight them outside your claimed areas.
Stalkers go after the nearest Warden instead of the Landing Zone. They will cross claimed areas to reach a Warden. When Burrowers reach an area next to your claimed areas, they wait a day, go underground, then surface at the Landing Zone. Kill them at the border or fight them at the Landing Zone. A Stronghold doesn't stop them.
A Broodmother fights at 1.25x strength and makes its bloom spawn twice as often. Each nest has one. A pack standing on a nest also gets 1.4x strength.
| Breed | Strength | Raid weight | Telegraph days | Notes |
|---|---|---|---|---|
| Feral pack | x1 | x1 | 2 | spore-warped fauna, dangerous in numbers |
| Stalkers | x1 | x1 | 2 | always move toward the nearest Warden, never the Landing Zone |
| Brutes | x2 | x2 | 3 | twice the muscle, but they mass for 3 days before striking |
| Corroders | x1 | x1 | 2 | eat the claim itself, even when held off - meet them off your ground |
| Burrowers | x1 | x1 | 2 | wait a day at your border, then surface inside the Landing Zone; walls mean nothing to them |
| Broodmother | x1.25 | x1 | 2 | its bloom breeds twice as fast while it lives |
| Alpha pack | x1.5 | x1.5 | 2 | fights at +50%; break it and the survivors scatter |
How packs wake up, walk, and try to take your areas.
A pack takes 0.6 day to enter the next area, then waits 1 day before moving again. It normally takes the shortest route to the Landing Zone. If a Warden is next to it, it goes for the Warden instead. The map shows where it stands, and a red arrow points to the area it will enter next.
Packs on the map begin being asleep. One wakes when a Warden stands next to it, or you claim an adjacent area. A sleeping pack within 2 areas of your land also sends a full copy toward you every 31.5 to 48 days. Higher difficulties send them more often, but the sleeping pack never gets smaller. Those copies don't start before day 120. A pack you wake yourself attacks immediately, day doesn't matter.
A pack on one of your claimed areas starts a countdown if no Warden is there. Send one within 5 days or lose the area. The Landing Zone gives you 10 days, because if you lose that, it's game over. A Warden arriving stops the countdown. You can reclaim a lost area again after 10 days.
Lure costs 1 Vigor and takes 1 day. It pulls the whole pack onto the adjacent area where your Warden stands. That lets you choose where the fight happens.
Purple areas that spawn packs. Bloom doesn't spread.
Bloom is purple ground. Every day, each bloomed area you didn't clear has a small chance to spawn one feral pack, but not while a Warden stands on it. The pack appears on the bloom and starts to walk toward you. Higher difficulties and longer runs increase the chance. Packs standing on a bloom you haven't cleared have 3x strength. Every pack your Wardens draw off a bloom leaves the ferals that later defend it 10% weaker, and this stacks.
If a Warden walks onto a bloom, a pack of 2 ferals immediately spawns on it, on top of anything already there. Later defending packs are bigger: one more feral every 450 days of the run, up to 4. Kill everything on it, and the bloom is cleared: it stays purple, and it stops spawning for now. Normally you can't claim a bloomed area - on a few campaign maps you can. You can also burn a cleared bloom: it costs 4 Vigor and 6 Heat Cells, and a Warden has to stand on it for 3 days. The bloom fights back with a few ferals each day of the burn, and finishing it wakes the nearest sleeping pack. Then the purple is gone, the area is dead ground, and you can claim it. A cleared bloom you don't burn within 8 days grows back.
Every map has one special bloom area: the nest. Clearing the nest removes every cleared bloom, and then you can claim those areas - as dead ground, with nothing to gather or grow, no resources on them. Uncleared blooms continue to spawn packs until you clear them. While a Broodmother lives on a bloom, it spawns twice as often. Killing the nest also gives you 10 Morale and 2 Command.
Nests past the edge of the map. They never stop sending packs.
Every campaign region has at least one feral nest past the map edge. A purple line on the edge marks each one. You can't reach a nest, fight it or clear it. Each nest sends a pack in through the area next to the line, and the pack walks toward the Landing Zone like any other. On Mild a nest sends 1 feral about every 48 days. On Lethal it sends 2 about every 24 days. The gap changes from pack to pack, and now and then a pack comes one or two ferals bigger. Each year the packs get one feral bigger, up to 6. From year 3 the nests send more often, down to half the gap, more packs are brutes, corroders or stalkers, and every feral grows 10% stronger a year, up to 60%. Fungal Grid stays gentler: its packs stop at 4 and it skips the late-year ramp. The first pack comes after the grace period ends.
A campaign region always has the same number of edge nests. A scenario map rolls when it's made: half have none, and a few have up to three. Keep Wardens on the area next to a nest and they meet every pack as it comes in.
Lose it and the run ends.
The Landing Zone is your starting area. If a pack takes it, the run ends.
Only Wardens can defend areas - a Stronghold doesn't. If a pack reaches the Landing Zone with no Warden there, you have 10 days to send one. Its arrival stops the countdown.
A Stronghold adds strength to fights on its own area and prevents surprise attacks there. Buildings with combat bonuses help every fight on the map, not only fights where they stand.
Difficulty changes the world and the clock. Pace only changes the clock.
Difficulty changes feral numbers and strength, all resource consumption, starting Command and Morale, score multiplier, desertion speed and quest patience. Hostile is the baseline. Every other difficulty scales from it. The setup screen has the exact numbers.
Pace only changes timers. Relaxed gives quests 2x as long and drains 0.5x as much Command when they are overdue. Sandbox has no quests or score. Campaign mode doesn't have Sandbox pace.
Ferals grow stronger as a run goes on. Higher difficulties rise faster. The bonus stops at +50%.
| Mild | Hostile | Lethal | Brutal | Hardened I | Hardened II | Hardened III | |
|---|---|---|---|---|---|---|---|
| Start Command | 50 | 45 | 36 | 35 | 32 | 30 | 28 |
| Start Morale | 20 | 12 | 5 | 0 | 0 | 0 | 0 |
| Feral pressure | x0.2 | x0.78 | x1.45 | x1.7 | x1.8 | x1.9 | x2 |
| Feral strength | x0.8 | x1 | x1.1 | x1.4 | x1.5 | x1.6 | x1.7 |
| Raid waves | x0.7 | x0.85 | x1 | x1.2 | x1.25 | x1.3 | x1.35 |
| Escalation/day | +0.03 | +0.07 | +0.11 | +0.15 | +0.17 | +0.19 | +0.21 |
| Colony upkeep | x0.9 | x1 | x1.1 | x1.25 | x1.32 | x1.4 | x1.48 |
| Quest patience | x1.25 | x1 | x0.95 | x0.75 | x0.7 | x0.65 | x0.6 |
| Desertion per Morale point | 0.03 | 0.04 | 0.04 | 0.06 | 0.08 | 0.1 | 0.12 |
| Impatience drain | x1 | x1.1 | x2.2 | x2.75 | x3.3 | x3.85 | x4.4 |
| Score multiplier | x0.75 | x1 | x1.5 | x2 | x2.4 | x2.8 | x3.3 |
Modifiers you take on for score.
Assignment and scenario modes use twists. You start with 26 available, out of 33 total. There are 3 kinds of twists: 17 "hostile" make the run harder. 10 "boon" make it easier. 6 "trade" give you a benefit with a cost.
Only twists with a downside increase score. A hostile twist adds 15% to your final score, and a trade twist adds 5%. Boons add nothing. The bonuses add up, to a cap of 1.6x.
Scenarios give you 2 twist slots and you can buy 2 more with stars. Assignments come with a fixed set of twists instead.
| Twist | Kind | Effect |
|---|---|---|
| Spore Surge | Hostile | The blooms are spitting spores. Expect far more ferals than usual. |
| Hardened Packs | Hostile | These ferals are scarred and slow to drop. Bring more Wardens. |
| Swarm Season | Hostile | Blooms fill past their usual size. Hit them before they top out. |
| Lean Stores | Hostile | Half the manifest never made the drop. Scavenge or starve. |
| Hungry Ground | Hostile | Stores go fast in this soil. Upkeep runs well over budget. |
| Ash Drift | Hostile | The sky stays shut. Heat burns through the Drift far faster. |
| Wasting Sickness | Hostile | Something's in the air. New colonists arrive slowly, if at all. |
| Restless Colony | Hostile | Nobody wanted this posting. Morale sits low from day one. |
| Faithless Flock | Hostile | Colonists don't trust you. Desertion risk runs high all run. |
| Silent Uplink | Hostile | The relay barely holds. Research crawls this far out. |
| Blind Survey | Hostile | Scanners fight the ground here. Every survey takes far longer. |
| Broken Relays | Hostile | Heavy static on every channel. Command comes back at half rate. |
| Green Wardens | Hostile | Your Wardens are fresh out of training. They fight soft. |
| Thin Air | Hostile | Every breath is work. Vigor refills slowly. |
| Brittle Frames | Hostile | The prefabs cracked in transit. Every building runs under output. |
| Stripped Ruins | Hostile | Someone got here first. The wrecks are picked clean. |
| Impatient Directorate | Hostile | Command wants results now. Every quest runs on a short clock. |
| Quiet Season | Boon | The packs are holed up. Far fewer ferals on the move. |
| Deep Cellars | Boon | The last crew left their cellars stocked. You start well over manifest. |
| Mild Drift | Boon | The cold shows late and stays shallow. Heat lasts through the Drift. |
| Eager Volunteers | Boon | Word got out. Transports come full and colonists keep arriving. |
| Deep Roots | Boon | The ground takes to settlers. Almost nobody walks out. |
| Veteran Escort | Boon | The Directorate sent Wardens who've done this before. They hit harder. |
| Surveyor's Luck | Boon | Clear skies and honest ground. Surveys come back fast. |
| Rich Ruins | Boon | Wrecks everywhere, barely touched. Scavenging pays well here. |
| Standing Orders | Boon | Clean relays and orders already cleared. Command refills fast. |
| Directorate Cache | Boon | A sealed cache waits at the Landing Zone. You start with slack. |
| Scorched Manifest | Trade | Lost the supplies in the drop, but you've still got the salvage maps. |
| Forced March | Trade | Colonists push hard and recover fast, and they eat for it. |
| Open Ground | Trade | No cover out here. Surveys run fast, and the packs see you coming. |
| Press Gang | Trade | The transports came full. Nobody volunteered, and Morale shows it. |
| Culled Bloom | Trade | The Drift thinned the blooms. Smaller packs, and the survivors are mean. |
| Quiet Relays | Trade | Research runs clean out here. Orders don't get through as well. |
| Trait | Kind | Cost | Effect |
|---|---|---|---|
| Dense Blooms | Negative | 4 | feral pressure +40% |
| Feral Vanguard | Negative | 5 | feral strength +40%, feral pressure +20% |
| Killing Frost | Negative | 3 | Drift heat burn +40%, Morale target -3 |
| Barren Landing | Negative | 2 | start supplies -40% |
| Sour Water | Negative | 2 | upkeep +20% |
| Packed Bags | Negative | 2 | desertion +40%, Morale target -3 |
| Dead Air | Negative | 3 | research time +40% |
| Raw Recruits | Negative | 2 | Warden strength -20% |
| Rich Veins | Positive | 3 | start supplies +40%, scavenge +20% |
| Fertile Ground | Positive | 2 | growth +40%, Morale target +3 |
| Old Clearance | Positive | 2 | start Vigor +2, start Command +6 |
| Temperate Belt | Positive | 2 | Drift heat burn -40%, Morale target +3 |
| Hardy Stock | Positive | 2 | upkeep -20% |
| Blooded Guard | Positive | 2 | Warden strength +20% |
| Honest Ground | Positive | 1 | survey speed +20% |
| Clean Signal | Positive | 2 | research time -20% |
A fixed scenario that changes every few days.
An assignment is a scenario the game sets for everyone: one map, one difficulty and a fixed set of twists, the same for every player, rolling over every 3 days. It unlocks after your first campaign win and shows on the Progress screen's Overview tab as the Active Assignment.
Its twists are rolled based on the date, you can't pick or buy them. 4 times a year a seasonal event replaces the roll with its own set for two weeks. Score and stars work as in any scenario.
| Event | Dates | Twists | Notes |
|---|---|---|---|
| The Deep Drift | 12/18 - 1/3 | Ash Drift, Hungry Ground, Deep Cellars | Peak cold. Whatever you've stored is all you're getting. |
| Bloomfall | 4/5 - 4/19 | Spore Surge, Swarm Season, Surveyor's Luck | The thaw's here, and everything beneath the snow's waking up. |
| The Dry Season | 8/8 - 8/22 | Hungry Ground, Thin Air, Rich Ruins | Wells are turning brackish, but the ruins aren't hiding anymore. |
| The Lean Turn | 10/24 - 11/7 | Wasting Sickness, Stripped Ruins, Standing Orders | Final weeks before the Drift. The sick aren't healing up. |
Optional goals that pay Vigor and Command.
Scenarios hand out side quests on top of the main chain: store a resource, grow the colony, hold a number of areas, or clear a named pack. Up to 2 run at once and each expires after 45 days. Finishing one pays Vigor, Command or both. Missing one costs nothing.
How a win is graded and turned into stars.
Score starts with (900 minus finish day) / 3 for speed, plus 15 per survivor, plus Command / 2. Reaching 100 Morale adds +10%. Difficulty then multiplies it, from 0.75x on Mild to 3.3x on Hardened III. Assignment twists multiply it again, up to 1.6x. Finishing after day 900 gives no speed score. A loss scores zero.
Stars use fixed score thresholds: 120 for 2, 250 for 3, 400 for 4 and 600 for 5. A 5-star win needs a quick finish on a high difficulty. Mild can't reach 600, however well you play.
Five side goals tracked per region.
Every campaign region tracks 5 feats, 135 across the campaign. Progress > Feats & Doctrine lists them per region.
The feats are: finish within 220 days, win on Lethal or higher, finish with 16 colonists, lose no Wardens, and win without losing any areas.
| Feat | How |
|---|---|
| Swift | Secure the region inside 220 days. |
| Proven | Secure the region on Lethal or above. |
| Crowded | Secure the region holding 16 colonists. |
| Unbloodied | Secure the region without losing a Warden in battle. |
| Unyielding | Secure the region without losing an area. |
The three ways a run ends.
At zero Command, the Directorate recalls you. This is the usual slow loss. Outpost > Leaders shows what's draining it.
Losing the Landing Zone ends the run instantly. A pack has to hold it for 10 days first.
Having 0 population ends the run after 15 days with nobody housed. Growth keeps running while the clock does, so one arrival resets it.
We all make mistakes.
Undo reverses up to 5 actions before the next day ticks over. Find it in the map controls, Outpost > Resources, or with Ctrl+Z on pc, CMD+Z on mac.
Cancel a build before a crew starts it for a full refund. Once work has started, it can't be cancelled.
Everything you keep between runs, and where it lives.
You can find your various progressions behind PROGRESS on the main menu. It holds everything that carries over from run to run, split into tabs. Overview: the Active Assignment and three Rebuilding bars (your best scores added up, colonists raised across all runs, and regions won, each against a fixed target). Artifacts: the 27 you can own and the ones you acquired.
Contribution: your star balance, the 12 boons, and Supplies, the 4 things stars buy repeatedly (offer and artifact rerolls, a region reseed, a twist slot). Feats & Doctrine: feats per region and the doctrines you've drafted. Commissary: 40 cosmetics. Requisition Roster: content you unlock by playing. Frontier Map & Regions: the campaign map and your best result on each region.
Stars are the one currency here. Boons, cosmetics, rerolls and reseeds all use it. Artifacts, feats, doctrines (50) and unlocks (15) are earned by playing and can't be bought.
Small permanent bonuses drafted after new wins.
There are 50 doctrines in three families: 17 production, 17 society, 16 knowledge. Each is a small tweak of a few percent, and everything you acquired applies to every campaign and scenario run.
The first time you win a campaign region at a difficulty you haven't secured it on, you draft one of 3. A win that already offers an artifact draft doesn't offer a doctrine. Progress > Feats & Doctrine shows what you acquired, by family.
| Doctrine | Family | Effect |
|---|---|---|
| Tight Rations | Production | Portions measured, not guessed. |
| Shift Rotation | Production | Nobody pulls two brutal shifts in a row. |
| Careful Hands | Production | Slow's smooth. Smooth loses less. |
| Deep Bins | Production | Dig stores down, not out. |
| Salvage Rights | Production | What the crew hauls, the crew logs. |
| Picked Clean | Production | Never leave scrap behind twice. |
| Standing Stock | Production | Manifest never ships short. |
| Landing Surplus | Production | Someone at the depot likes you. |
| Stored Vigor | Production | A day's work held in reserve. |
| Steady Drip | Production | The relay never goes quiet. |
| Second Shift | Production | Lamps stay lit past the bell. |
| Lean Frames | Production | Less structure, less to feed. |
| Cold Store | Production | Heat Cells keep better underground. |
| Fiber Reserve | Production | Store a bale of Fiber before the first Drift. |
| Quiet Kilns | Production | Output's up, arrivals are down. Nobody minds. |
| Measured Draw | Production | The colony learns to want less. |
| Wide Nets | Production | Cast further, feed more mouths. |
| Shared Table | Society | One mess hall, no assigned seats. |
| Open Ledger | Society | Everyone sees what the colony holds. |
| The Named Dead | Society | Every loss goes on the wall by name. |
| Early Beds | Society | Beds go up before the survey. |
| Wide Doors | Society | Anyone who walks in gets counted. |
| Settled Ground | Society | Deeds issued in year one. |
| Long Leases | Society | Leaving costs more than staying. |
| Known Faces | Society | Small colony - everyone's accounted for. |
| Staff College | Society | Officers trained on site. |
| Runner Corps | Society | Orders move at a jog. |
| Seal of Office | Society | Directorate's signed off before you even land. |
| Writ of Landing | Society | Authority granted in advance. |
| Patient Directorate | Society | Looks like someone upstairs bought you time. |
| Quiet Dispatches | Society | Capital won't hear the bad news anytime soon. |
| Drill Yard | Society | Wardens train between raids. |
| Veteran Cadre | Society | Old hands on every line. |
| The Held Line | Society | Wardens first, census second. |
| Field Notes | Knowledge | Every survey writes it down. |
| Clear Optics | Knowledge | Lenses ground on site. |
| Mapped Approaches | Knowledge | You'll know the routes before you touch the dirt. |
| Open Channel | Knowledge | The Uplink stays keyed. |
| Relay Discipline | Knowledge | No chatter. Research moves. |
| Shared Findings | Knowledge | One colony figures it out, they all know it. |
| Bloom Ledger | Knowledge | Track the spread so you'll see it coming. |
| Culling Theory | Knowledge | Cut early, cut small. |
| Pack Studies | Knowledge | Their habits are on file. |
| Nest Atlas | Knowledge | Every den's mapped before trouble starts. |
| Drift Almanac | Knowledge | Cold's right on schedule now. |
| Season Tables | Knowledge | Drift's just a date now, not a surprise. |
| Containment Doctrine | Knowledge | Blooms are boxed, not chased. |
| Quarantine Lines | Knowledge | Losing area's all part of the plan. |
| Salvaged Archive | Knowledge | Old-world files, still legible. |
| The Long Watch | Knowledge | Someone is always looking outward. |
Permanent bonuses you pick between regions.
There are 27 artifacts, listed under Progress > Artifacts. Securing a campaign region for the first time offers 3. Keep one and it applies automatically to every later run.
Bigger regions offer better artifacts. Each campaign drafts from its own set. Rerolling the offer costs stars.
| Artifact | Campaign | Tier | Effect |
|---|---|---|---|
| Heat Cell Cache | Foothold | Small | +3 starting Vigor. |
| Seed Vault | Foothold | Small | +4 starting Biomass and Filtrate. |
| Deep Stores | Foothold | Small | +4 storage cap for all base resources. |
| Command Codex | Foothold | Small | +10 starting Command. |
| Fiber Looms | Foothold | Small | Start with +4 Fiber and +2 Heat Cells. |
| Landing Charts | Foothold | Small | Start with an adjacent area surveyed. |
| Warden Seals | Foothold | Medium | +10% Warden fighting strength. |
| Hydro Reclaimers | Foothold | Medium | -8% colony resource consumption. |
| Uplink Antenna | Foothold | Medium | -15% research time. |
| Growth Vats | Foothold | Medium | +15% colonist growth. |
| Survey Lenses | Foothold | Medium | +20% survey speed. |
| Leader's Mark | Foothold | Medium | +2 Command whenever you finish a goal. |
| Watchtower Network | Foothold | Medium | Feral raids take +1 day to prep before striking. |
| Veterans' Hall | Foothold | Large | +20% Warden fighting strength. |
| Genesis Ark | Foothold | Large | Land with a 2nd colonist, Biomass and Filtrate, and +15% growth. |
| Bloom Suppressor | Foothold | Large | Blooms spread 15% slower; packs cap out 1 smaller. |
| Directorate Mandate | Foothold | Large | Start with +20 Command and +15% faster Command refill. |
| Salt Larder | Carrion | Small | +6 starting Biomass and +4 Biomass storage cap. |
| Picker Crews | Carrion | Small | +20% scavenge output. |
| Rendering Hooks | Carrion | Small | Every feral kill salvages +0.3 Biomass. |
| Blooded Recruits | Carrion | Medium | New Wardens start one veterancy step in. |
| Flensing Drill | Carrion | Medium | Ferals fight 10% weaker. |
| Stalker's Patience | Carrion | Medium | Goal clocks run 15% longer. |
| Windfall Rights | Carrion | Medium | Clearing a bloom or nest pays out +50%. |
| Abattoir Vats | Carrion | Large | +10% production and -5% colony consumption. |
| War Hymns | Carrion | Large | +10% Warden fighting strength and +10% faster Command refill. |
| The Great Feast | Carrion | Large | Land with a 2nd colonist and +6 Biomass. +10% growth, +3 Morale target. |
Starting advantages bought with stars.
There are 12 boons under Progress > Contribution, each costing 3 to 8 stars. Owned boons apply to every future run, such as extra starting Vigor or Command, more storage, or faster growth.
Boons make a run easier without affecting your score.
| Boon | Stars | Effect |
|---|---|---|
| Surveyor's Cache | 3 | start Vigor +2 |
| Landing Manifest | 4 | start supplies +25% |
| Deep Pantry | 4 | +5 storage cap for Biomass and Filtrate. |
| Command Seal | 5 | start Command +8 |
| Gate Charter | 5 | growth +15% |
| Survey Doctrine | 5 | survey speed +20% |
| Warden Code | 6 | Warden strength +10% |
| Uplink Head Start | 6 | research time -12% |
| Heat Discipline | 6 | Drift heat burn -15% |
| Rationing Code | 7 | upkeep -8% |
| Resonant Standards | 7 | Morale target +5 |
| Directorate Favor | 8 | patience +15% |
What a win's stars buy.
A win pays stars based on its score. Stars are the only currency between runs, and they don't expire.
Spend stars on boons or rerolls. Rerolling a setup offer costs 1, an artifact offer 2, a region map 4, and a permanent twist slot 6. Each gets more expensive when you buy it again, up to a cap.
Caps: setup offer reroll: 1 star, +1 every 3 buys, caps at 4. Artifact draft reroll: 2, +1 every 2 buys, caps at 6. Region map reseed: 4, +1 per buy, caps at 10. Twist slot: 6, +1 per buy, caps at 10.
Rerolls change what a run offers you, boons change what you start it with.
Stars also buy cosmetics under Progress > Commissary: 40 items across 4 slots (card plates, map palettes, victory banners, menu titles), from 3 to 80 stars. They change looks only. The rerolls and the twist slot are bought under Progress > Contribution > Supplies.
| Purchase | Base | Ramp | Cap | What it does |
|---|---|---|---|---|
| Re-roll the artifact draft | 2 | +1 every 2 | 6 | Reroll for three new artifacts from this tier. You'll stash your current pick. |
| Re-seed this region | 4 | +1 every 1 | 10 | Get a fresh map for a secured region. Since it's re-seeded, it won't match the original hand-drawn plate. |
| Scenario modifier slot | 6 | +1 every 1 | 10 | Draft one extra modifier before each run. It's permanent. |
| Re-roll the scenario offer | 1 | +1 every 3 | 4 | Pull three different artifacts from your collection for this run. |
| Item | Slot | Stars | Notes |
|---|---|---|---|
| Field Plate | Card plate | 4 | Standard issue, scuffed. |
| Ash Plate | Card plate | 6 | Grey on grey. Survivor's taste. |
| Ember Plate | Card plate | 8 | Warm brass when it's freezing out. |
| Verdant Plate | Card plate | 10 | Green, 'cause you held your ground. |
| Bloodwork Plate | Card plate | 14 | Earned somewhere loud. |
| Relay Plate | Card plate | 18 | Uplink violet, for whoever's listening. |
| Directorate Plate | Card plate | 24 | Gilt trim. Guess you're someone's favorite. |
| Deepwatch Plate | Card plate | 30 | Issued to the outermost postings. |
| Ossuary Plate | Card plate | 40 | Bone-white. Nobody asks about it. |
| Lastlight Plate | Card plate | 55 | Color of a sky that didn't break. |
| Standard Survey | Map palette | 4 | Just how the Directorate printed it. |
| Dusk Survey | Map palette | 6 | Long shadows on every claim. |
| Saltflat Survey | Map palette | 8 | Bleached, flat, honest. |
| Rust Survey | Map palette | 10 | Old iron under every field. |
| Deepgreen Survey | Map palette | 14 | How the biome sees itself, anyway. |
| Cinder Survey | Map palette | 18 | Drawn after a bad season. |
| Glacier Survey | Map palette | 24 | Cold light on cold ground. |
| Spore Survey | Map palette | 30 | Rendered in bloom color. |
| Nightwatch Survey | Map palette | 40 | For reading by lamp. |
| Goldrun Survey | Map palette | 55 | Every claim inked in gold. |
| Foothold Banner | Victory banner | 5 | First flag anyone stuck in the dirt. |
| Wardens' Banner | Victory banner | 8 | Carried by the people who held the wire. |
| Quartermaster's Banner | Victory banner | 11 | Stitched from surplus canvas. |
| Sundering Banner | Victory banner | 15 | Flown over what was broken. |
| Last Stand Banner | Victory banner | 20 | Torn, kept, flown anyway. |
| Unbroken Banner | Victory banner | 28 | No repairs on this one. |
| Reclamation Banner | Victory banner | 36 | For ground taken back twice. |
| Long Watch Banner | Victory banner | 48 | Grey, plain, very old. |
| Ashcrown Banner | Victory banner | 60 | Awarded, never requested. |
| Hardened Banner | Victory banner | 80 | Only flown above Brutal. |
| Settler | Menu title | 3 | Where everyone starts. |
| Holdfast | Menu title | 5 | You didn't move. |
| Bloomwarden | Menu title | 8 | You kept the spread honest. |
| Ashwalker | Menu title | 11 | You crossed the bad seasons. |
| Quartermaster | Menu title | 15 | Nothing spoiled on your watch. |
| Relaykeeper | Menu title | 20 | The Uplink never went dark. |
| Nestbreaker | Menu title | 26 | You went to them. |
| Frontier | Menu title | 34 | Seventeen regions of it. |
| Unyielding | Menu title | 45 | No given ground on record. |
| Last Command | Menu title | 60 | There's nothing above this. |
| Cartographer | Menu title | 0 | Found every secret on the Foothold frontier. |
Long-term goals tracked across runs.
There are 61 achievements. They track secured chapters, regions secured at each difficulty, stars earned, feats collected, and a few particular finishes.
They unlock the moment their condition is true, even between runs, and never need claiming. Nothing in the game is locked behind Achievements, and no Achievements are locked behind anything.
| Achievement | How |
|---|---|
| First Landing | Secure your first region. |
| What Was Broken | Clear The Sundering and close the first arc. |
| The Last Stand | Clear Last Stand and close the Foothold campaign. |
| The Long Table | Clear the Carrion campaign. |
| A People, Not a Colony | Secure all 17 Foothold regions. |
| Flawless | Secure a region at five stars. |
| Standard Bearer | Secure five regions at five stars. |
| Unbroken Record | Secure twelve regions at five stars. |
| Hard Ground | Secure a region on Hostile. |
| Nothing Given | Secure a region on Lethal. |
| Brutal Ground | Secure a region on Brutal. |
| Chain of Command | Win with five different commanders. |
| The Whole Roster | Win with ten different commanders. |
| Resonance | Hold a Resonance Festival. |
| Season of Plenty | Hold five Resonance Festivals in one run. |
| Off the Map | Win a scenario run. |
| Deep Water | Win a scenario at danger 5. |
| The Long Haul | Keep a colony alive into its fifth year. |
| Crowded Table | House twenty colonists at once. |
| The Living Colony | Win a scenario as the Symbiote. |
| Feast or Famine | Win a scenario as the Carrion. |
| The Creeping Tide | Win a scenario as the Mycelia. |
| Held the Wire | Secure a siege region on Brutal. |
| Second Landing | Secure a region on Hardened I. |
| No Ground Given | Secure a region on Hardened II. |
| It Remembers You | Secure a region on Hardened III. |
| Nothing Handed Over | Secure all 17 Foothold regions on Hostile or above. |
| The Hard Way | Secure all 17 Foothold regions on Lethal or above. |
| First Ground | Secure every region in Chapter I. |
| Room to Stand | Secure every region in Chapter II. |
| Past the Green Line | Secure every region in Chapter III. |
| Deep Frontier | Secure every region in Chapter IV. |
| The Long Reach | Secure every region in Chapter V. |
| Old Roads | Secure every region in Chapter VI. |
| What We Kept | Secure every region in Chapter VII. |
| Contributor | Earn 100 stars of contribution. |
| Underwriter | Earn 500 stars of contribution. |
| Everything on the Shelf | Own every boon. |
| The Full Reliquary | Own every artifact. |
| Paperwork Filed | Buy your first requisition. |
| Signed the Log | Play a daily drop. |
| A Week of It | Play seven daily drops in a row. |
| Every Morning | Play thirty daily drops in a row. |
| Took the Hard Draw | Win a run carrying a modifier. |
| Stacked Against | Win a run carrying three modifiers at once. |
| Off the Map, Repeatedly | Win five scenario runs. |
| By the Book | Win a scenario as the Foothold. |
| Named in Dispatches | Earn a mastery title with any commander. |
| A Deep Bench | Earn a mastery title with five commanders. |
| Undying | Win fifty runs with one commander. |
| Noted | Earn your first regional feat. |
| A Record of It | Earn twenty regional feats. |
| Nothing Left Undone | Earn all five feats on one region. |
| The Whole Frontier | Earn every feat on every region. |
| Standing Order | Take your first doctrine. |
| House Style | Hold ten doctrines. |
| The Whole Manual | Hold twenty-five doctrines. |
| Written in Full | Hold every doctrine. |
| Off the Manifest | Find your first secret. |
| The Whole Story | Find every secret in the Foothold campaign. |
| The Old Crew | Find every secret in the Carrion campaign. |
Where a score goes after the run.
A finished campaign run posts to that region's board, a daily drop posts to that day's board. Scenarios and assignments don't use leaderboards. The score is the same one on the results screen.
Each entry carries your stars, finish day, difficulty and the year you reached alongside the score. Boards need a connected platform account. Nothing is posted from an offline run.
One hidden find in every campaign region.
Each campaign region hides one secret, 27 in all. The hint sits on the region's card in the Campaign menu, so read it before you start. Some secrets are a thing on the map to find and tap once the area is surveyed. Others want a particular order, a particular day, a particular commander, or a run played a particular way.
A found secret opens a card with a plate and a lore entry, and both stay on the Secrets tab in Progress. Secrets never change the run: nothing is gained in-game, and nothing is locked behind them except the achievements for finding every secret in a campaign. Scenarios don't carry secrets.
One fixed map per day, the same for everybody.
Each day has one drop: a fixed map, difficulty and twist set based on the date. You bring your own commander. Everyone who plays that day gets the same run, and you can retry it as often as you like: the best score counts.
Drops stay playable for 30 days. Only today's drop counts toward a streak. Personal bests are kept for each drop.
Two picks at setup that change different rules.
Besides the Pathfinder played in the tutorial, there are 18 commanders and 15 colony traits. Commanders change how you act: action costs, research pace, etc. Traits are pure bonuses that shape the opening: extra stocks and storage, free Vigor on your first surveys, claims, builds, scavenges or expeditions, an extra colonist or Warden, a head start on Morale or Command. Most are locked until you earn them: Progress > Requisition Roster lists what you unlock by playing: 8 of the traits and 7 of the twists, with the condition for each.
Some change rules rather than numbers. The codex notes those where they matter: The Diplomat for example gets Command only from quests and relics, while The Driftborn ignores the Drift.
Three commanders carry an ability with a cooldown. The Speaker rallies for +20 Morale every 15 days. The Driver surges for +5 Vigor every 20 days. The Hunter purges a small pack next to your land for 15 Command, every 25 to 45 days depending on how strong the pack was.
Wins with the same commander earn a mastery title shown on the setup card: Commended at 3, Decorated at 5, Exemplar at 10, Vaunted at 15, Storied at 25, Undying at 50 wins.
Runs things by the numbers. Fast hands, and the Uplink stays dark for the first 50 days.

Wardens hit half again as hard. Once they're in, they're in.

Raised in the frost. The farms don't notice Drift, and nobody wants to walk in the warm.

Counts the packs in the fog before anyone crosses. Surveys run cheap, and she takes her time signing off a claim.

Nobody leaves, nobody argues, and nobody smiles.

Shelves go up before you ask - along with the Fiber bill. Caps won't bite.

Everything goes up overnight. Nobody's happy about the hours.
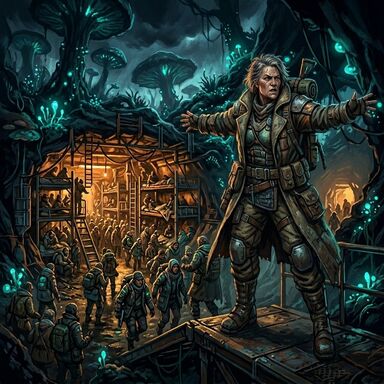
Den caps are just suggestions. Dens fill up anyway; people who don't like it know where the door is.

A lone area works hard. Crowd it with neighbors and it slacks off.
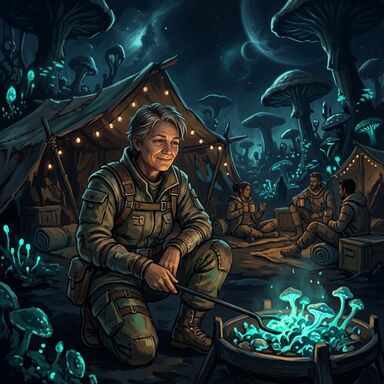
Trouble never costs a thing. There's just less to choose from.

Every surveyed field feeds the pot on its own. Ask what's living out there and you get a shrug.

Turns a recruit into a Warden overnight. Won't sign one up until the colony's grown into it.

Walks right past sleeping packs and they never stir. Areas she surveys and leaves unclaimed fog back over.

Nothing overflows the stores: spare Filtrate becomes Biomass, spare Biomass Fiber, spare Fiber Heat Cells.
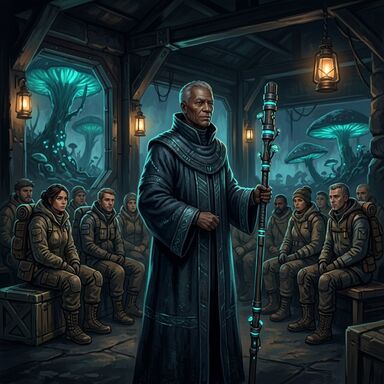
Quests pay double and Command comes from nowhere else. An overdue quest wears on Morale, not on the Directorate.

Quiet until they rally everyone. Morale dips between speeches.
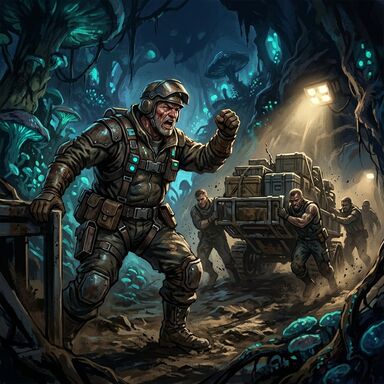
Daily pace drags, but they'll crush deadlines in one big push.

Routine hits are soft, but the kill shot clears the whole pack.
| Trait | Effect | Flavour |
|---|---|---|
| Provisioned | +35% to +65% start resources; +40% to +60% storage caps; +10 to +20 start Morale | Deep shelves and full crates. Everyone slept fine on the way in. |
| Stocked | +35% to +65% start resources; +15% to +25% goal patience; first 2 to 3 Vigor of builds free | They landed loaded, and the first few builds are already paid for. Nobody's counting days yet. |
| Roaming | +35% to +65% start resources; first 2 to 4 Vigor of surveys free | Surveys by habit. The first stretch of ground gets walked for free. |
| Tireless | -25% to -15% build time; +3% to +7% production | Nobody clocks out. Builds go up fast and the yards run hot. |
| Fertile | +5% to +15% colony growth; +1 starting colonist | One more colonist stepped off the lander, and the rolls climb a little faster. |
| Tempered | +35% to +65% start resources; +8 to +12 Morale ceiling; +20% to +30% goal patience; +3 to +7 start Command | Slow to complain and slower to panic. Morale has room to climb. |
| Spirited | +10 to +20 start Morale; +4 to +6 Morale ceiling; +1 to +2 start Vigor; +7 to +13 start Command | Great mood from day one, and it holds. |
| Salvaged | -30% to -20% build resources; first 2 to 3 Vigor of builds free | They build out of what's already lying there. Every build takes less, and the first few take nothing. |
| Frugal | +40% to +60% storage caps; first 2 to 3 Vigor of scavenging free | Nothing gets thrown out. Deep shelves, and the first scavenge runs come free. |
| Hardy | +35% to +65% start resources; +1 starting Warden | One of them came armed. Weather-proof and unbothered. |
| Zealous | +1 to +2 start Vigor; first 2 to 4 Vigor of expeditions free | They came to do something. The first expeditions go out on their own dime. |
| Veteran | +10% to +20% goal patience; +2 to +3 start Vigor; +7 to +13 start Command | Second colony for most of them. They know the drill, and the brass knows them. |
| Restless | +2 to +3 start Vigor; first 2 to 3 Vigor of claims free | Nobody unpacked. They hit the ground with Vigor to spare and claim what they see. |
| Ascetic | +3 to +7 start Morale; +8 to +12 Morale ceiling; +20% to +30% goal patience; +7 to +13 start Command | Content on very little. Morale runs high and nobody rushes the goals. |
| Heirloom | +80% to +120% start resources; +40% to +60% storage caps | They carried the old stores across, and built the shelves to hold them. |
| Title | Wins with one commander |
|---|---|
| Commended | 3 |
| Decorated | 5 |
| Exemplar | 10 |
| Vaunted | 15 |
| Storied | 25 |
| Undying | 50 |
| Unlock | Kind |
|---|---|
| Salvaged | Colonist trait |
| Frugal | Colonist trait |
| Hardy | Colonist trait |
| Zealous | Colonist trait |
| Veteran | Colonist trait |
| Restless | Colonist trait |
| Ascetic | Colonist trait |
| Heirloom | Colonist trait |
| Brittle Frames | Twist |
| Culled Bloom | Twist |
| Press Gang | Twist |
| Deep Roots | Twist |
| Ash Drift | Twist |
| Quiet Relays | Twist |
| Broken Relays | Twist |
Who you're playing as.
Scenario mode has 4 factions. Each changes combat, production and feral behaviour, and has its own map and interface color.
The first campaign is played as the Foothold and the second one as the Carrion. Scenarios let you pick any of the four.
Foothold plays the base rules. Full toolkit, no handicap, no gimmick.
Carrion produces at 75%. Every feral kill salvages 0.6 Biomass and 0.4 Filtrate, cleared blooms and nests pay 2x, and each kill adds 0.15 Command refill for 5 days.
Symbiote grows 0.4 Biomass per colonist and 0.15 per claimed area on its own, and gets +4% output per distinct claimed terrain. It can't build Spore Orchards or Fauna Pens, and blooms grow their packs 1 feral larger before they stop (normally 5).
Mycelia doesn't claim. It creeps into surveyed areas in 3 days and regrows lost areas in 2, ignores rivers, and fights at +25% on defense and 80% on the attack.
| Faction | In a line |
|---|---|
| Foothold | The balanced pick: full toolkit, zero gimmicks, no handicaps. |
| Symbiote | Grows Biomass from its own flesh. No farms needed - the colony feeds itself. |
| Carrion | Feast or famine. Your soil yields little, but the dead are your harvest. |
| Mycelia | Doesn't claim land - it spreads. Creeps like a tide across land and water. |
Two arcs, two factions.
The Foothold campaign has 17 regions. Securing Last Stand unlocks the Carrion campaign: 10 regions, where the goals count kills and the packs keep coming in tides.
Each campaign drafts its own artifacts on a first win: the Foothold regions the original set, the Carrion regions 10 of their own. Everything you acquire applies to every future run.
| # | Map | Chapter | Goals | Last deadline (days) | Map modifiers |
|---|---|---|---|---|---|
| 1 | Fungal Grid | I | 8 | 900 | bloom cap -2, feral pressure -15%, patience +15% |
| 2 | Spore Reach | I | 9 | 800 | bloom cap -3, feral pressure -10%, upkeep -10% |
| 3 | Abyssal Tide | II | 9 | 900 | bloom cap -1, feral pressure -10% |
| 4 | The Drowning Deep | II | 9 | 950 | bloom cap -1 |
| 5 | Fracture Zone | III | 8 | 950 | feral pressure +8% |
| 6 | The Sundering | III | 9 | 1050 | feral pressure +20% |
| 7 | The Long Crossing | IV | 8 | 840 | upkeep -25%, feral pressure +10% |
| 8 | The Corridor | IV | 8 | 460 | bloom cap -1 |
| 9 | The Oasis | IV | 8 | 420 | scavenge +20%, growth +20%, bloom cap -2 |
| 10 | Bloom Tide | V | 9 | 460 | patience +30%, bloom cap -2, bloomGrowthMult 0.5 |
| 11 | Quarantine | V | 9 | 900 | baseline |
| 12 | The Breach | V | 9 | 460 | feral strength +25%, feral pressure +15% |
| 13 | The Archipelago | VI | 8 | 420 | feral pressure +20%, feral strength +15% |
| 14 | The Lost Outpost | VI | 8 | 800 | feral pressure +10% |
| 15 | Pilgrimage | VI | 9 | 620 | bloom cap -2 |
| 16 | The Citadel | VII | 9 | 700 (+2 open) | feral pressure +20% |
| 17 | Last Stand | VII | 7 | none | feral pressure +20% |
| # | Map | Hook |
|---|---|---|
| 1 | Fungal Grid | First landing. Soft turf, towering spore stalks, and ferals that've never seen a fence. |
| 2 | Spore Reach | Deep in the fungal wilds. Growth's thick, and the ferals have had years to settle in. |
| 3 | Abyssal Tide | Flooded shelf over the abyss. Filtrate's everywhere, but you'll have to fight for everything else. |
| 4 | The Drowning Deep | Past the shelf over open abyss. Every trench breeds blooms - you'll only win by overwhelming them with numbers. |
| 5 | Fracture Zone | A shattered plateau with tight chokepoints, deep ruins, and the biggest feral packs you'll ever face. |
| 6 | The Sundering | A dive into the deepest rift. Endless ruins, razor-thin rations, and blooms nesting ahead. Don't starve. |
| 7 | The Long Crossing | A rough march corner to corner with two rivers for company. That far gate's your only way out. |
| 8 | The Corridor | A tight canyon two cells wide and nine deep. Ferals hold the high ground - take it back band by band. |
| 9 | The Oasis | Lush core, dead zone, rich outer rim. Don't linger in the middle - it's nothing but trouble. |
| 10 | Bloom Tide | Half the map's purple and spreading fast. Beat the bloom before the Directorate writes you off. |
| 11 | Quarantine | The center's lost. Lock down the outer ring and don't let it break. |
| 12 | The Breach | Ferals locked down the walled center, and there's only one way in. Break the siege. |
| 13 | The Archipelago | Five islands tied by five causeways. Lose a single crossing and your far banner starves. |
| 14 | The Lost Outpost | An abandoned colony's waiting in the waste. Habs, stores, cold condenser - bring Haven back online. |
| 15 | Pilgrimage | Walk four corner shrines in order. Keep the roads open or you won't survive the trip. |
| 16 | The Citadel | A keep, a moat, four bridges, and endless wilds. Hold the ring through three drifts - don't let 'em breach. |
| 17 | Last Stand | 600 days against a rising tide - that's the whole job. Build a colony that'll outlast it. |
| # | Map | Chapter | Goals | Last deadline (days) | Map modifiers |
|---|---|---|---|---|---|
| 1 | The Bonefield | I | 7 | 460 | feral pressure -10% |
| 2 | The Cordon | I | 9 | 700 | feral pressure +15%, bloom cap +1 |
| 3 | The Gullet | II | 8 | 600 | baseline |
| 4 | The Lean Ground | II | 7 | 520 (+2 open) | feral pressure -20% |
| 5 | The Old Breach | II | 9 | 600 | feral pressure +10% |
| 6 | The Brood Pits | III | 8 | 620 | bloom cap +1 |
| 7 | The Rotting Keep | III | 8 | 520 (+2 open) | feral pressure -20% |
| 8 | The Saltmarsh | III | 9 | 640 | feral pressure +5% |
| 9 | The Migration Road | IV | 8 | 660 | feral pressure -5% |
| 10 | The Feast | IV | 9 | 200 (+8 open) | feral pressure -15% |
| # | Map | Hook |
|---|---|---|
| 1 | The Bonefield | Four arms of feral ground around a salvage yard. The soil's thin and the packs aren't. Learn the trade. |
| 2 | The Cordon | The Foothold's quarantine line, packed tight from the inside. Open a gate and let the meat come to you. |
| 3 | The Gullet | A canyon that funnels packs down from a bowl. Hold the canyon, kill what comes through, then take the Maw. |
| 4 | The Lean Ground | Thin soil, few packs, and the packs keep moving. Chase 'em or starve. |
| 5 | The Old Breach | The Sanctum the Foothold broke, full of ferals again. One bridge in, and more meat behind the wall than anywhere else on the frontier. |
| 6 | The Brood Pits | Three pits that refill with Drift-bred packs every few weeks. Clear them out, and find out if bad meat is worth the salvage. |
| 7 | The Rotting Keep | The Foothold's empty Citadel. The wilds still attack again and again, and every attack is a harvest. Hold the bridges. |
| 8 | The Saltmarsh | Two rivers, three fords. Every pack that crosses has to come over open ground. Hold the fords. |
| 9 | The Migration Road | Every pack the frontier pushed out is walking back down the road. Camp on it, band by band. |
| 10 | The Feast | Twelve blooms on the rim, and your crews alone below. Hold the Long Table, then go up and kill what sent the tide. |
One colony, saved continuously - there are no save slots and no manual save. The game writes after every meaningful change and restores exactly where you left off, including mid-order. Saves are versioned and migrated forward, so a colony started on an older build keeps playing on a newer one; a save written by a newer build than the one reading it is refused rather than guessed at, and left untouched so upgrading again recovers it.
Mouse and keyboard, touch, or a gamepad, and the on-screen hints follow the device actually in your hands rather than the platform you bought on. Keys are rebindable, with Escape and the fullscreen pair reserved - a rebinding that could lock you out of the menu that does the rebinding is not offered.
Terrain quality, ambient effects and map detail are separate settings rather than one slider, because they cost different things: terrain is memory, ambient is frame time, detail is both. A frame-rate chip can be turned on from options to see what a change actually did.
The demo is the tutorial plus the first six campaign maps - Fungal Grid, Spore Reach, Abyssal Tide, Drowning Deep, Fracture Zone and The Sundering - with scenarios, the daily drop and assignments held for the full game. A demo colony carries over: the full game recognises it and picks up where the demo stopped rather than making you replay it.
The game reskins classic colony-sim vocabulary onto its alien setting:
| Genre term | Xenobiome term |
|---|---|
| Settlement | Landing Zone |
| Settlers / population | Colonists |
| Zombies / infested areas | Ferals / bloomed areas |
| Fighters | Wardens |
| Stamina | Vigor |
| Authority | Command |
| Winter | Drift season |
| Celebrations | Resonance festivals |
| Situations | Incidents |
| Technology levels | Uplink tiers |